What is Leech Protection all about? The Leech Protection feature is a security feature on cPanel.
You may ask, why do I need it? Well, it is simple. If a user is publicly posting usernames and passwords in restricted areas of your website, this can cause a breach in the security of your website. An unauthorized visitor may come across this and try to access secure areas of your website by trying out different passwords and you do not want this happening, trust us. You can prevent this by enabling the leech protection feature on your cPanel account.
So, what exactly does this Leech Protection do? It limits the number of login for a user within a period of time. The default period of time is two hours. If the number of maximum logins is exceeded, you can send an alert email to such user, direct the user to another URL of your choice or even suspend their account as the case may be.
Enabling Leech Protection
To enable the feature for your directory, it is fast and simple. Once you have logged in to your cPanel account, all you have to do is:
- Locate the Leech Protection icon under the Security section and click on it.
 Or you could just search by typing Leech Protect in the File box on cPanel home page and it will be displayed on the right side of the page. This is another way of finding features and it is quite fast.
- The Leech Protect window will appear and you will select the directory you wish to view.
- Navigate to the directory in which the folder you want to protect is in.
- Select the folder you want to protect by clicking on the name of the folder.
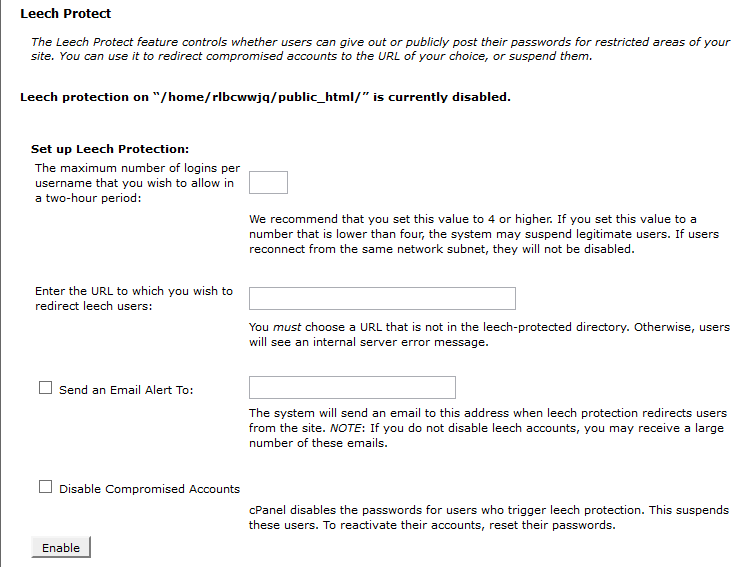
- The Leech Protect Setup window will appear.
 Here, you will enter the maximum number of logins you want for each username.
 - You also have to enter a URL to which any user who exceeds the maximum number will be directed to. Be sure not to choose a URL within the leech protected area.
- If you want to receive an email when account is being compromised, check the box which says “Send an Email Alert to:” and input an email address.
- Also, if you want to disable the compromised account, check the box which says “Disable Compromised Account“.
- Then Click Enable.
Disabling the Leech Protect
To disable Leech Protect
- Select the folder from which you want to disable leech protect by clicking on the name. Leech protected directories usually have a leech icon to their left.
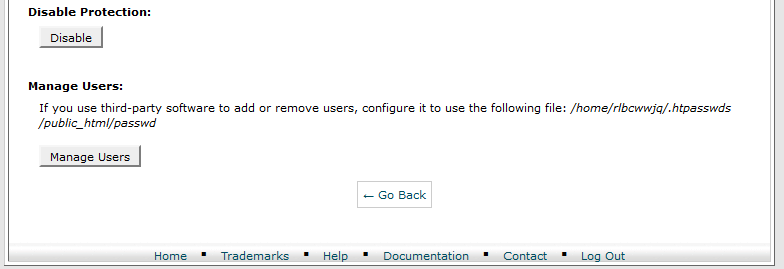
- Then click Disable at the bottom of the Leech Protect Setup page.

The directory is no longer leech protected.
Manage Users
You will notice a Manage Users button at the bottom of the Leech Protect Setup page when it loads. When you click on it, it directs you to the Password Protect Directory section for the directory which you are currently in. To know more about Password Protect Directories, you may go through our article on it here.
At CloudHost, we help our customers make the best of their websites. Join us today to enjoy more of our great services.

Pingbacks/Trackbacks
[…] Leech Protection […]