This is done via Password Protect Directory which is also called the Directory Privacy. With the Directory Privacy, you can password protect directories in order to limit access to certain resources on your website. Enable this feature to password-protect specific directories that you want to keep private from certain visitors. Any file that needs protection should be kept in a directory as only directories can be protected and not individual files. Password protect affects a folder and its subfolders. When you password protect a folder in cPanel, cPanel creates a rule which will require any visitor to provide the correct username and password to access the folder.
How to Password-Protect a Directory
- Log into your cPanel.
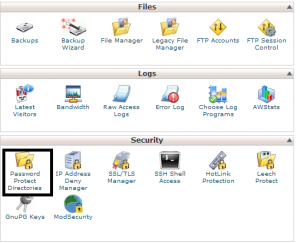
- Locate Password Protect Directories icon under the Security heading and click on it.

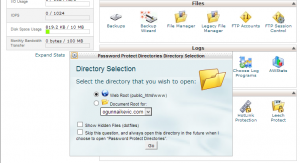
- Select the directory you wish to navigate to in the pop-up window.

- Now, click on the name of the folder you want to protect.
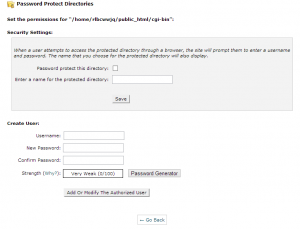
- A page of settings will appear which you will need to configure.
 Here, check the “Password protect this directory” box. You also need to fill in the name of the directory, it could be anything. This will be the message shown to visitors when they try to access your files. Now Click Save.
 - Click Go Back. Fill in your username and password and click Add Or Modify The Authorized User. When you visit your website on your server, you will be asked to log in. This shows that your directory has been password protected.
However, if you decide you want to make your folder open to the public, you just have to remove the password protect from your directory.
To Remove Password Protect From a Directory
- Log into your cPanel account.
- Locate Password Protect Directories icon under the Security heading and click on it.
- Select the folder for which you want to remove password protection by clicking on the folder name.
- Under Security Settings, uncheck the “Password protect this directory” checkbox.
- Now click on Save password protection is removed from this folder. Now everyone can access your files.
For further assistance, feel free to contact our support centre.

Hmn, this is enligtening!