In this article, we will be discussing briefly the basic features of the Legacy File Manager and the operations we can carry out on our files using this feature. Here, we assume that you are logged into your cPanel account and you have accessed the Legacy File Manager. If you do not know how to do this, find out how to here.
Now that you have been able to log into the Legacy File Manager, we will just go straight to introducing you to the basic features. They are not very different from the features in File Manager but there are still some noticeable differences as even the interface is quite different.
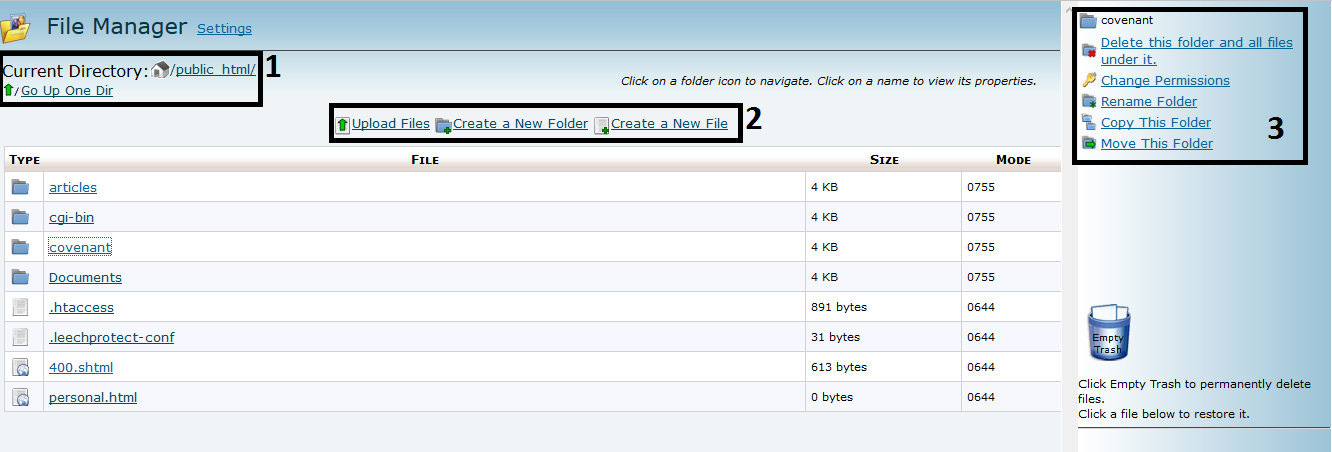
The Legacy File Manager will be displayed as shown below: 
Section 1:
This is the Navigation toolbar and it is used to navigate between folders in the file window. It contains the following tools:
- Home – this is used to navigate directly to the home directory.
- Go Up One Dir – this is used to navigate to the parent folder (folder containing the presently opened file of folder).
Section 2:
This is the Legacy File Manager Toolbar and it is used to upload or create new files or folders.
- The Upload option (
 ) – to upload files to the current directory.
 - The Create New File option (
 ) – to create a new file in the current directory with a user-specified extension.
 - The Create New Folder option (
 ) – to create a new folder in the current directory.
Section 3:
This is the Properties toolbar and it is used to manage files and folders. This interface displays different options for files and folders.
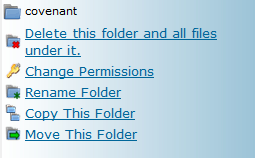
Folder options
These options are displayed when you click on a folder.
- Delete this folder and all files under it – this is used to delete the selected folder and all files and folders under it from the server.
- Change Permissions – this is used to change the Read, Write, and Execute permissions for the selected file.
- Rename Folder – this is used to rename the selected folder.
- Copy This Folder – this is used to copy the selected folder to another directory.
- Move This Folder – this is used to move the selected folder to another directory.
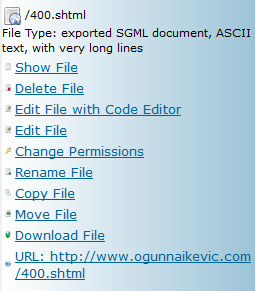
File options
These options are displayed when you click on a file.
- Show File – this is used to open the selected file in a new window.
- Delete File – this is used to delete the selected file from the server.
- Edit File with Code Editor – this is used to open the selected file in a code editor.
- Edit File – this is used to open the selected file in a text editor.
- Change Permission – this is used to change the Read, Write and Execute permissions for the selected file.
- Rename File – this is used to rename the selected file.
- Copy File – this is used to copy the selected file to another directory.
- Move File – this is used to move the selected file into another directory.
- Download File – this is used to download the selected file to your computer.
- URL – this displays the selected file as it appears to visitors.
And that is a simple presentation of the Legacy File Manager. If you have more questions, please drop them in the comment section below and we will answer them as soon as possible. Join CloudHost today for the best web hosting services.
Pingbacks/Trackbacks
[…] believe you know your way around the interface. But if you don’t, click here to know more about navigating through the Legacy File Manager. Now let’s get […]