Is a user using up your bandwidth, posting malicious contents or doing anything that poses a threat to your website? You can prevent them from doing so using the IP Address Deny Manager or IP blocker as some people may call it. cPanel allows you to block specific IP addresses and prevent them from accessing your website with the IP Address Deny Manager feature.
Block an IP address
The steps to blocking an IP address are as follows:
- Log into your cPanel account.
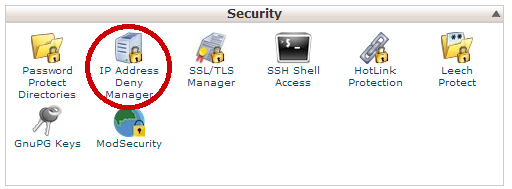
- The IP Address Deny Manager can be found in the Security section. Once you have located it, click on it.

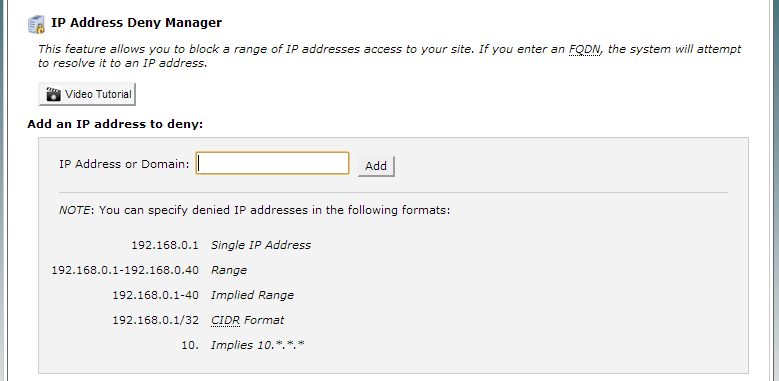
- The IP Address Deny Manager page is displayed.

- In the IP Address or Domain box, fill in the IP address or domain you wish to block. You can enter IP addresses in any of the following formats:
- Single IP address (for example,
10.5.3.333). - Range (for example,
10.5.3.3-10.5.3.40). - Implied range (for example,
10.5.3.3-40). - CIDR format (for example,
10.5.3.3/32). - Implied IP address (for example,
10.).
- Single IP address (for example,
- Now click on Add. The IP addresses you have blocked will be displayed below.

Unblock an IP address
If you no longer wish to block an IP address, unblocking such an address will also be done in the IP Address Deny Manager feature.
- Log into your cPanel account.
- Click on the IP Address Deny Manager.
- On the page that loads, scroll down to the bottom where you will see a list of blocked IP addresses.
- Locate the IP address you wish to unblock and click on the red ‘x’ sign in front of it.
 The IP address will now have access to your website.
You may check our article on Custom error pages.

Leave a Reply